Procedure for Inspection & Testing Batteries for Warranty Claims
The following conditions constitute abusive applications and will void the warranty:
1. Extreme Vibration applications (i.e., vibrating compactors, concrete cutters)
2. Dropping or hitting the battery
3. Cutting, removing, or damaging terminals
4. Overcharging battery via faulty regulator or dual battery setup not using approved management system
5. Using Starter battery for deep cycle applications (Car Audio Systems, Trolling Motors, refrigerators)
6. Opening case lid
General Guideline for Testing Batteries
Examples that will void Warranty
• Case and cover damage: Cracks or holes in case / cover
• Missing label
• Bent cover
• Shaved or cut cover / case
• Warped or bubbled cover
• Terminal damage: Melted, bent or broken terminals
• Shaved or cut terminals
• Sunken or raised terminals
Visual Inspection
Initial voltage test
a) 00.00V: to 00.90v: Open circuit, Remove from service. Warranty only applicable it the post has failed or an internal connect breakdown as a result of a manufacturing fault. Internal examination is required.
b) 1-.20V to 09.98V: Over discharge or application fault. Remove from service. No warranty
c) 10.00V to 10.98V: Possible broken Inter-cell connecter or straight short. Remove from service. Possible covered under warranty, unless evidence Indications of excessive use or Negative growth which not covered under warranty.
d) 11.00v to 12.55v: Flat need recharge and retesting. Flat batteries are not covered under warranty.
e) 12.55V to 12.70V: Fully charged, if fail under load remove from service, warranty applies if within specified warranty period.
f) 12.70V to 13.00V: low CCA at these voltages is normally an indicator of the Battery being Sulphated & therefore not covered under warranty. Low CCA is not a manufacturing fault it is more than often an application or customer fault. Batteries are manufactured to an international specification standard from the factory. The Battery will maintain for the majority of its life a reasonably close figure to the rating specified but will reduce in capacity over its life. Many factors may vary the output of the Battery.
Using an electronic battery tester is one method of quick testing and should only be used as an indicator as a load-test may be required. Sometimes internal examinations are the only way to determine the fault, but they are costly and time consuming and should only be performed by a Battery Specialist.
g) Magic Eye MF (Calcium Batteries Only) The magic eye is only an indicator, if the battery is charged or not. This test has a 30% variance and should only be used as a quick guide.
Procedure for testing batteries
1. Test voltage level
Use any multi meter or battery tester to record voltage level.
2. Electronic test Battery
Use an Electronic style test, if within 15% of CCA capacity put back in service. If low refer to Carbon pile test.
For Electronic testers, they are a guideline only for CCA ratings.
3. Charge
Charge the battery to 100% State-of-Charge if required. Use specified charger to suit the correct battery. (WET, CALCIUM MF, AGM, GEL and LITHIUM) all require a different peak voltage.
4. Load test
Inspect the batteries rating label to identify the battery CCA (Cold Cranking Amps) rating or Ah (Amp Hour) rating.
Note: Once the CCA or Ah rating is confirmed you will need to calculate the load current amount that can be applied to the batter during a load test.
General Cranking Batteries → Load current that can be applied to the battery is ½ of the batteries indicated CCA rating.
Marine or Deep Cycle Batteries → Load current that can be applied to the battery is 3 times the battery Ah rating.
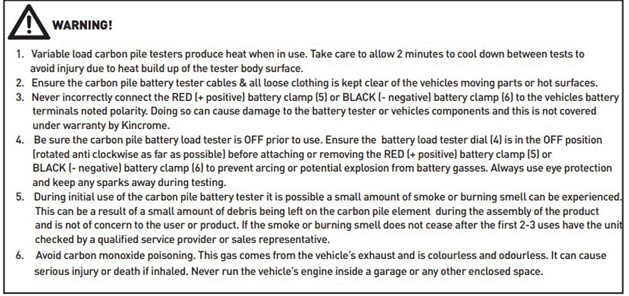
Connect the RED (+ positive) battery clamp (5) to the positive terminal (+) on the vehicles battery.
Connect the BLACK (- negative) battery clamp (6) to the negative terminal (-) on the vehicles battery.
Twist the clamps slightly on the post to ensure a good connection.
Rotate the battery load tester dial (4) clockwise until the required testing CCA or Ah rating is displayed/marked on the
Note: Ensure you ONLY APPLY the calculated load to the battery
After 15 seconds of the load being applied via the battery load tester please check the following
If the needle in the DC Volts display meter was indicating equal or above 9.5 volt test scale then the battery is in good condition and has passed the battery load test.
If the needle is drops below 9.5 volt of the DC Volts meter then the battery has failed the battery load test. Immediately remove the load applied to the battery by rotating the battery load test dial anti-clock- wise until is cannot be rotated any further. Once the battery load has been removed you can review the CCA, Ah rating indicated on the DC Amps meter for the current battery rating.